
How to build multi-purpose scenery for photos
When taking photos of miniatures you need quite a lot of scenery to make the photos come alive. Buying, making and painting terrain for just a single shot isn’t always doable. This is how to make a couple of houses that can be used in a number of different ways with just a little bit of extra work.
Patrolling Germans for illustrative purposes only.
When I was approached by Wargames Atlantic to paint up their new Landsknecht Ogres I immediately started thinking about what would be some cool scenic photos with them. Unfortunately I don’t own any specific “renaissance” terrain and since I don’t really game in that era (yet…) I wasn’t really prepared to spend a lot of money on terrain.
So I started googling for inspiration but didn’t really find anything until I remembered a post on the Perry Miniatures Facebook-page from a couple of years ago. Alan Perry had converted some of the Perry/Renedra plastic buildings to fit into 18th and 19th century rural Germany.
Not exactly what I had in mind but this gave me some ideas and the thought of making buildings that would have different sides which looked different struck me. Basically I would be able to get two (or more) buildings from one. These would probably not be suitable for gaming, but that wasn’t their purpose anyway, and they probably wouldn’t be very historically correct, but neither are Landsknecht Ogres so who cares.
I ended up buying two sets of the Renedra Medieval Cottage and some other pieces like plasticard, plastic tiled roof, some balsawood and some stencils from Sarissa Precision.

Some of the materials used for the buildings.
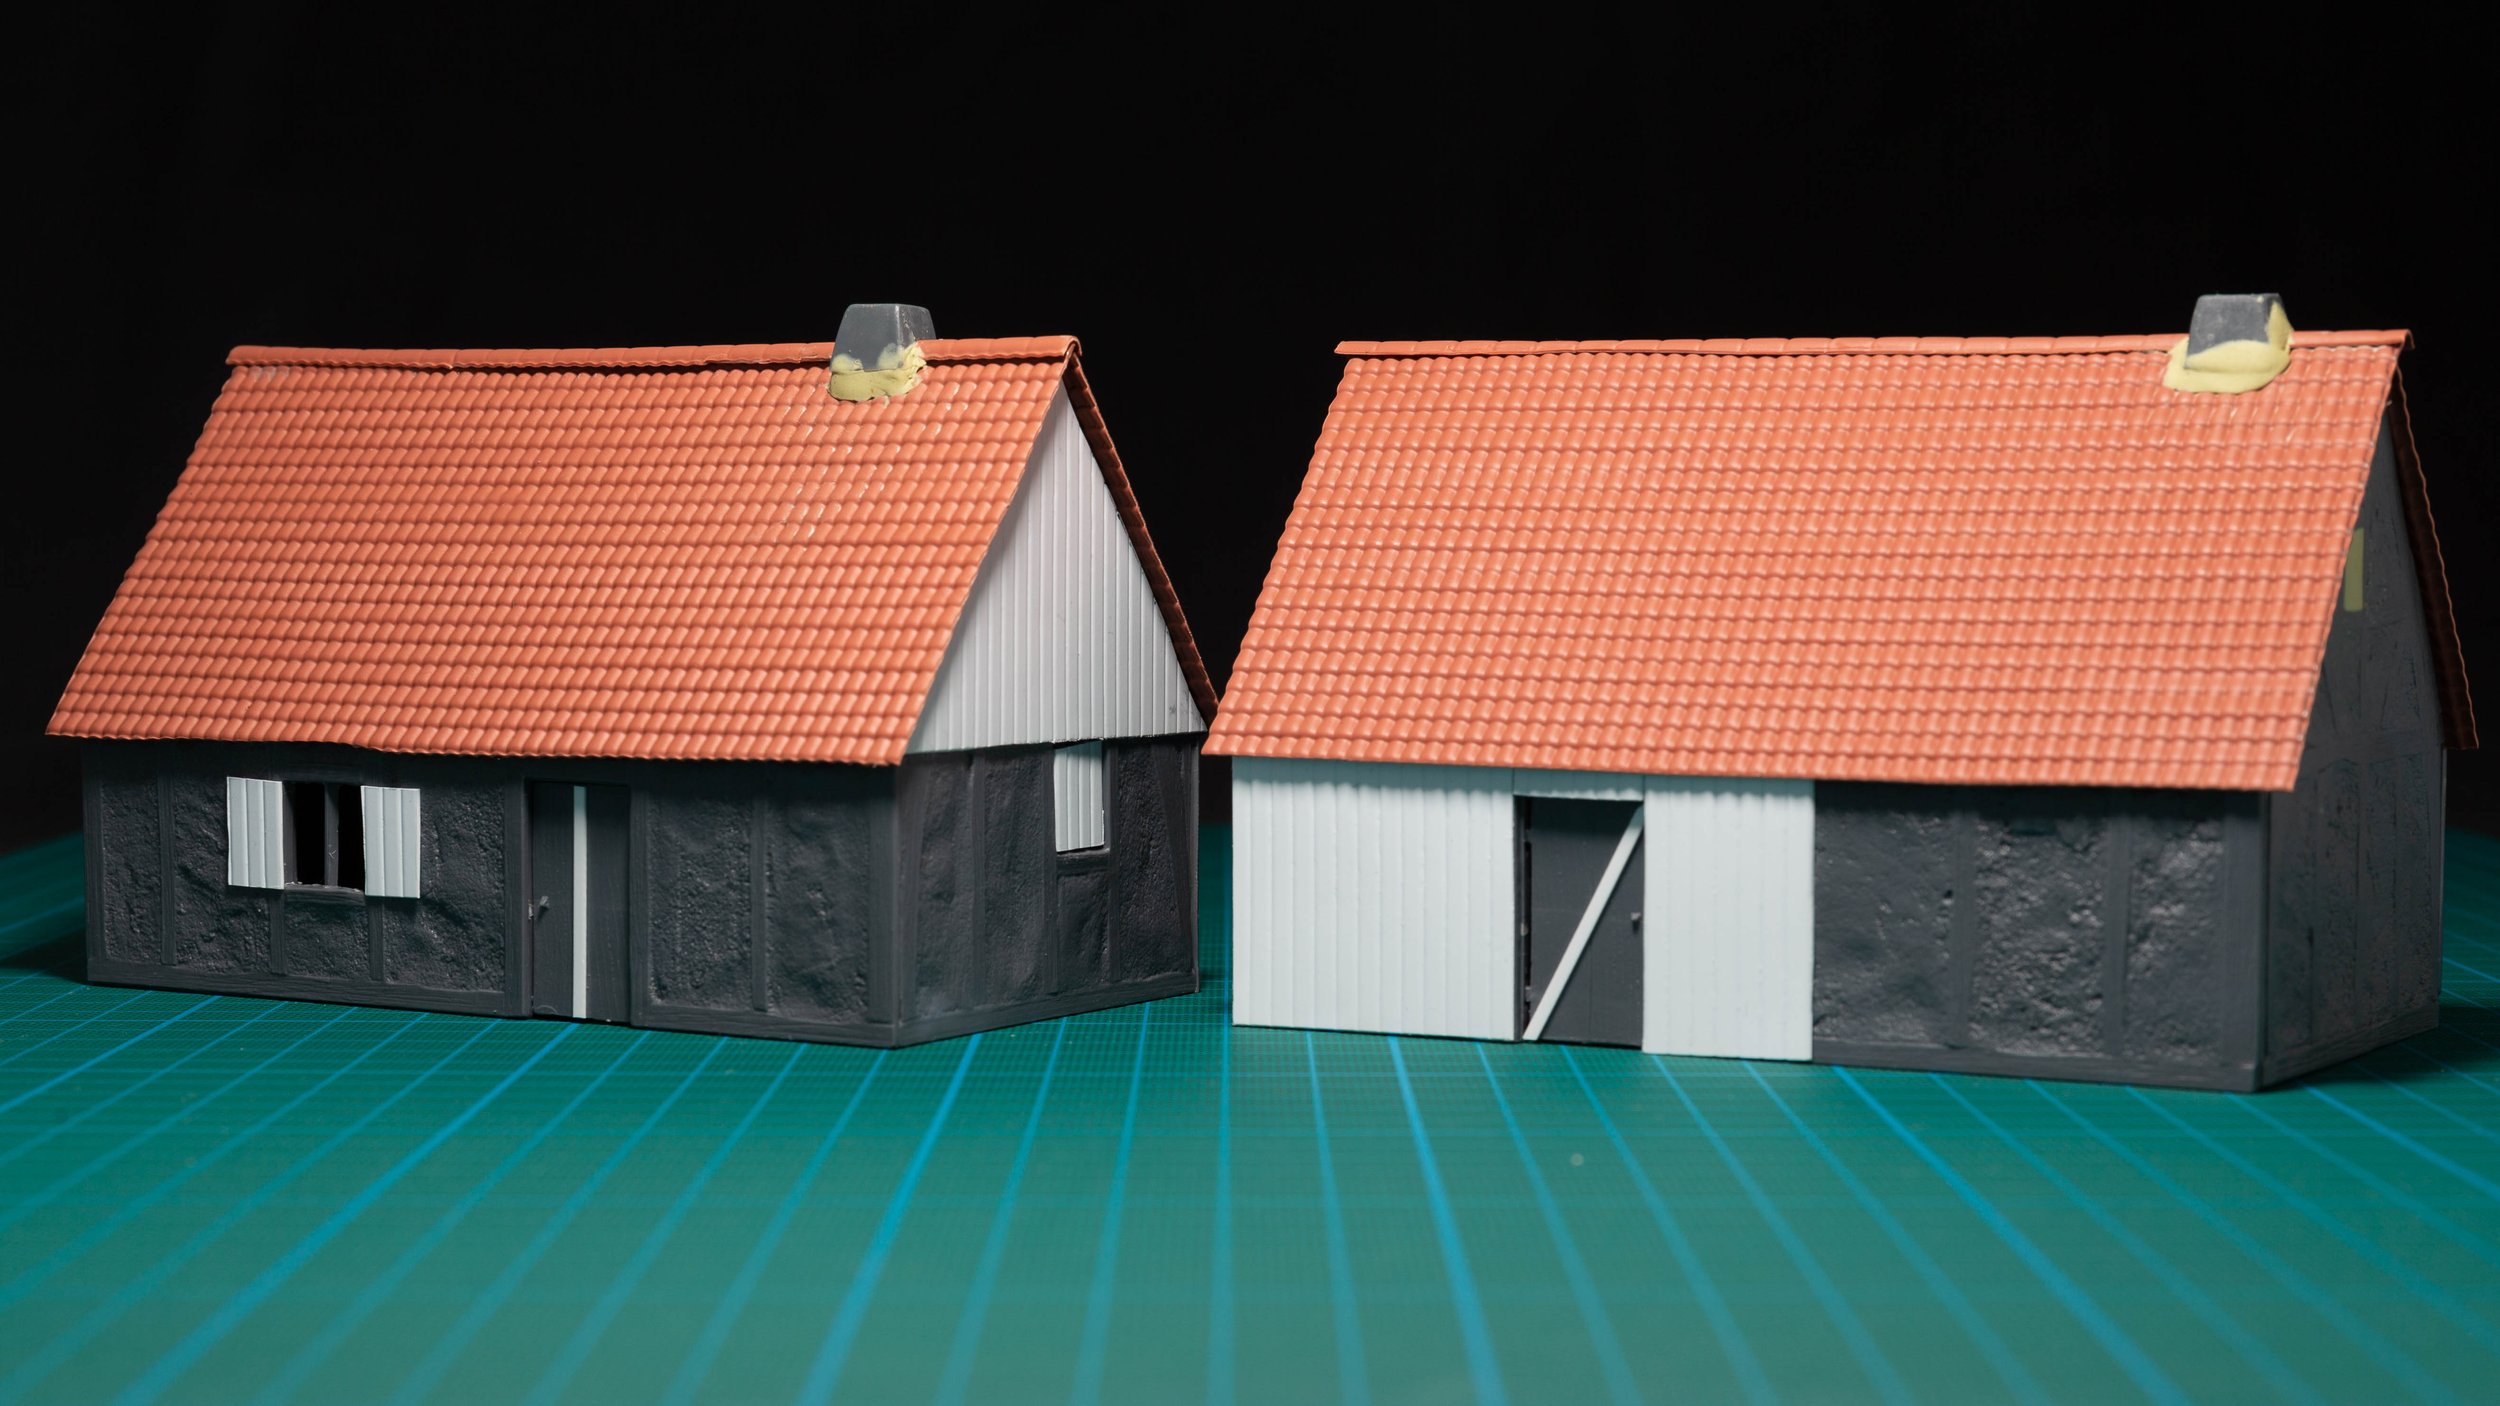
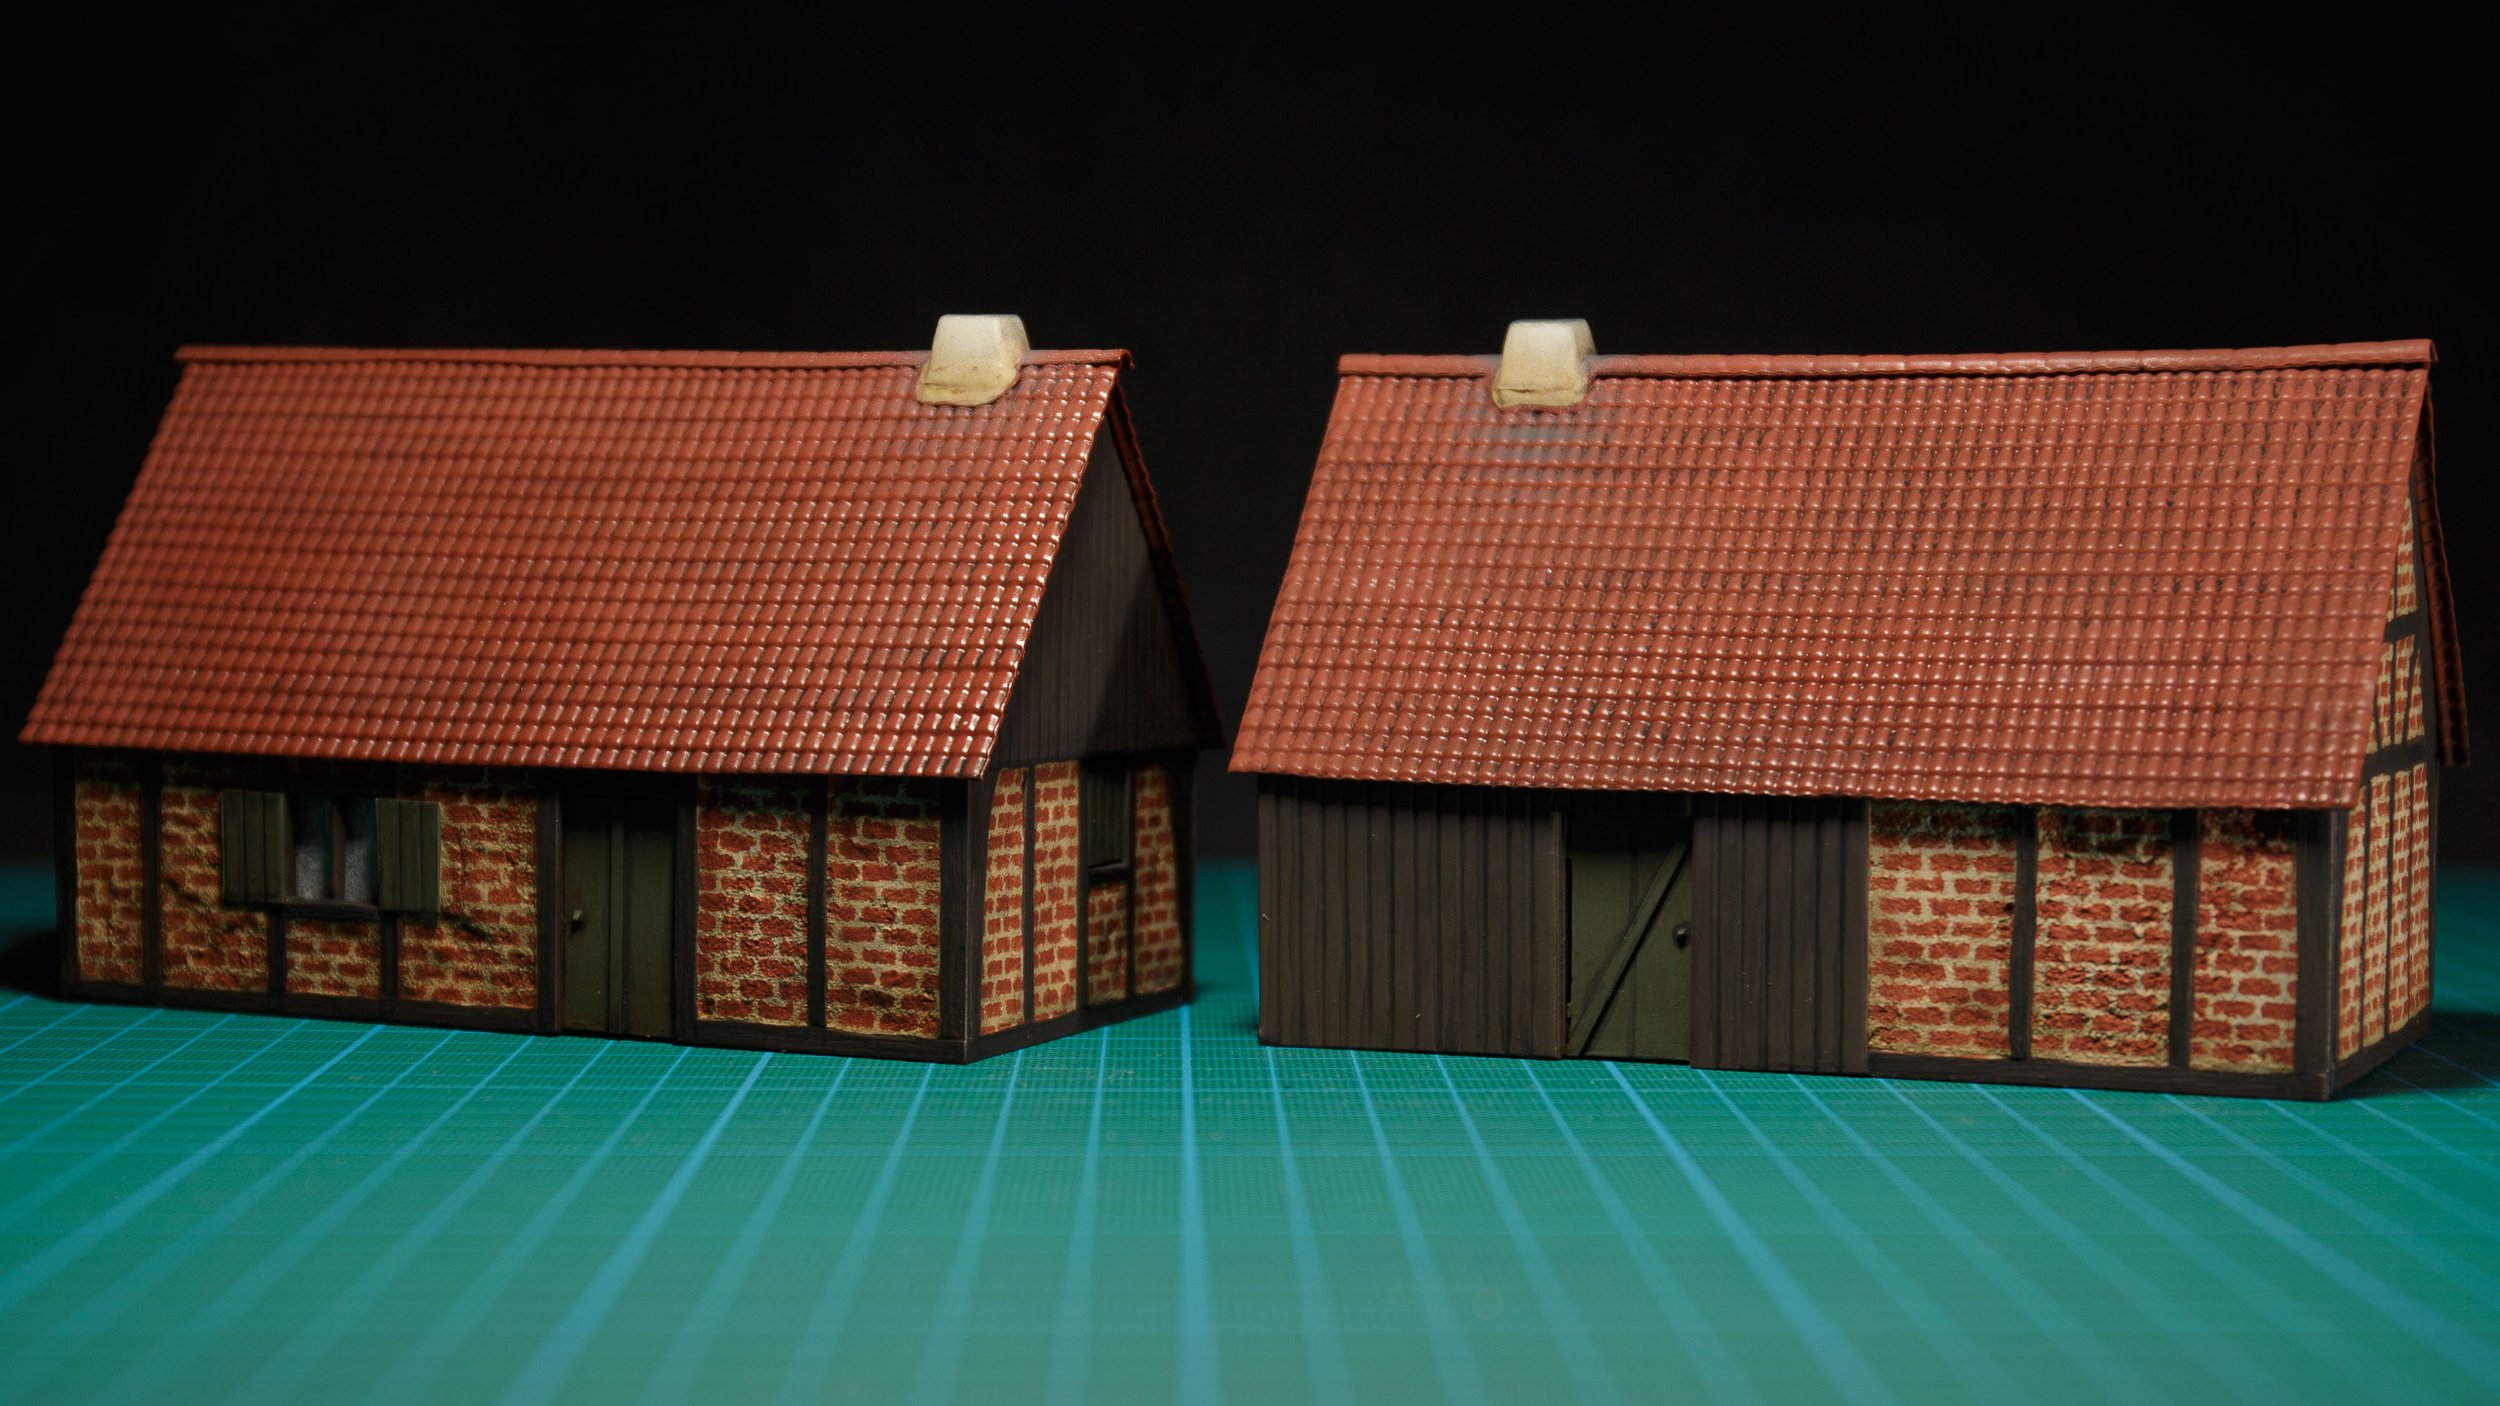
And the plan with this was to be able to make at least four different house fronts or facades. Most of the conversions will be a simple change of different roofs and some other minor details and then a suitable paint job.
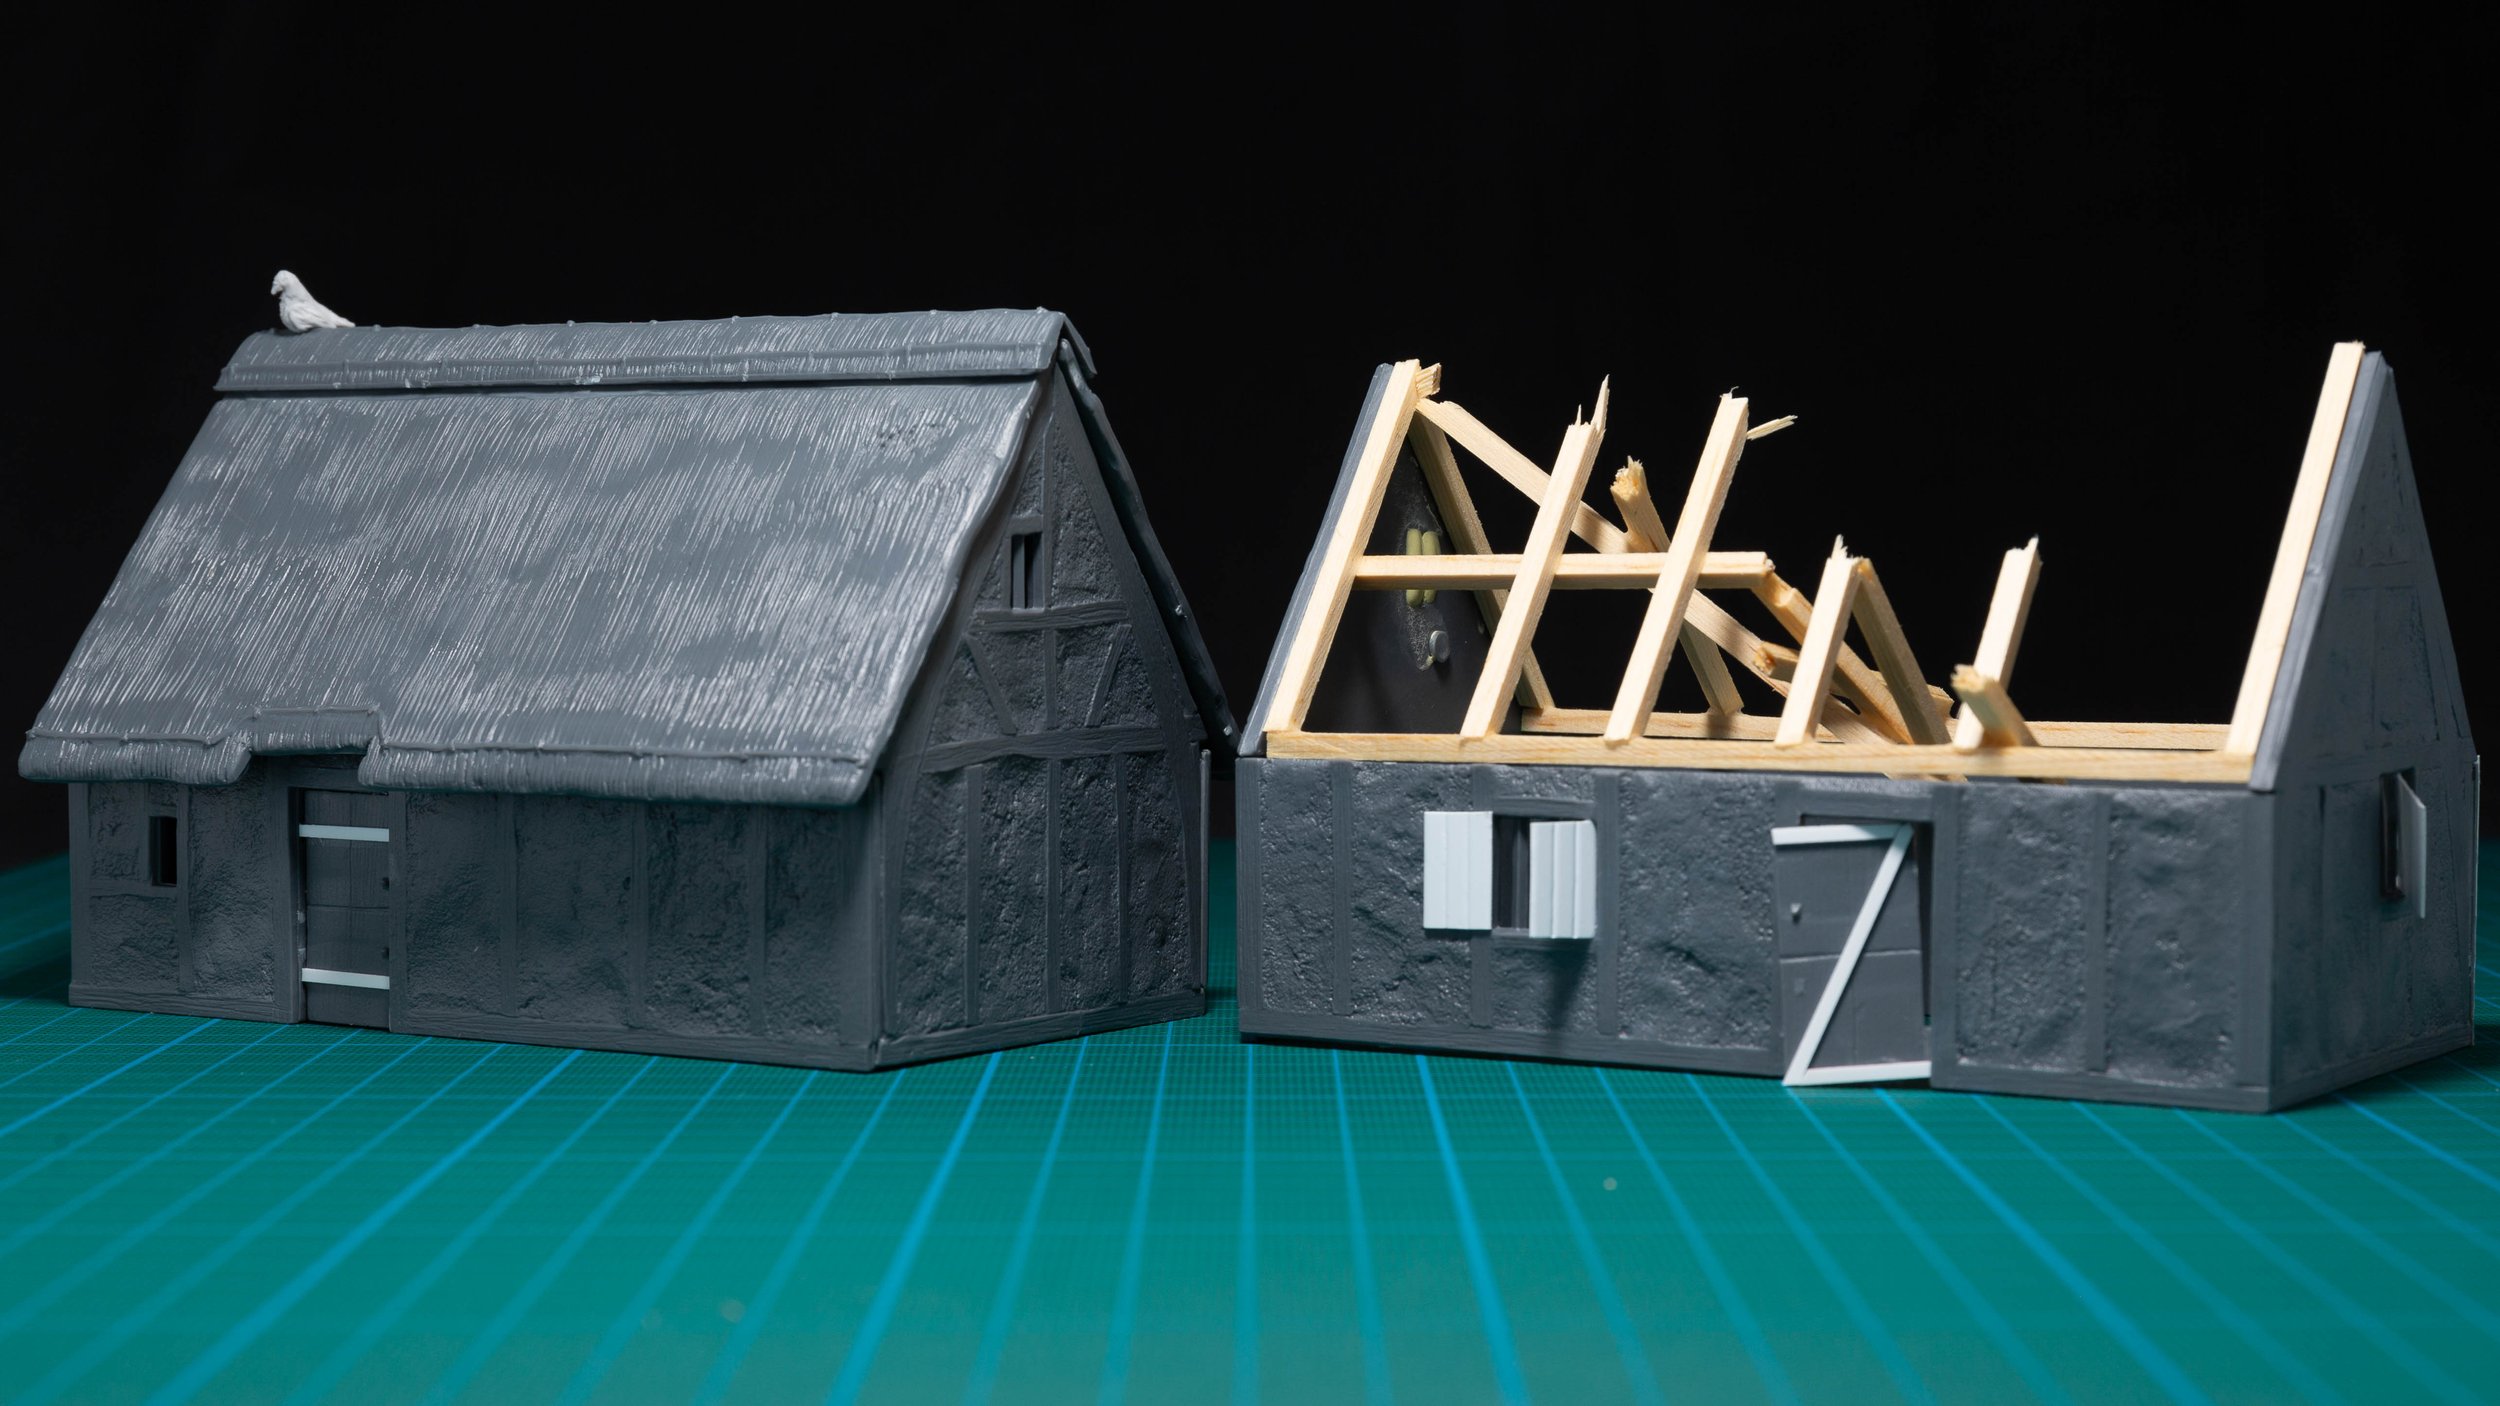
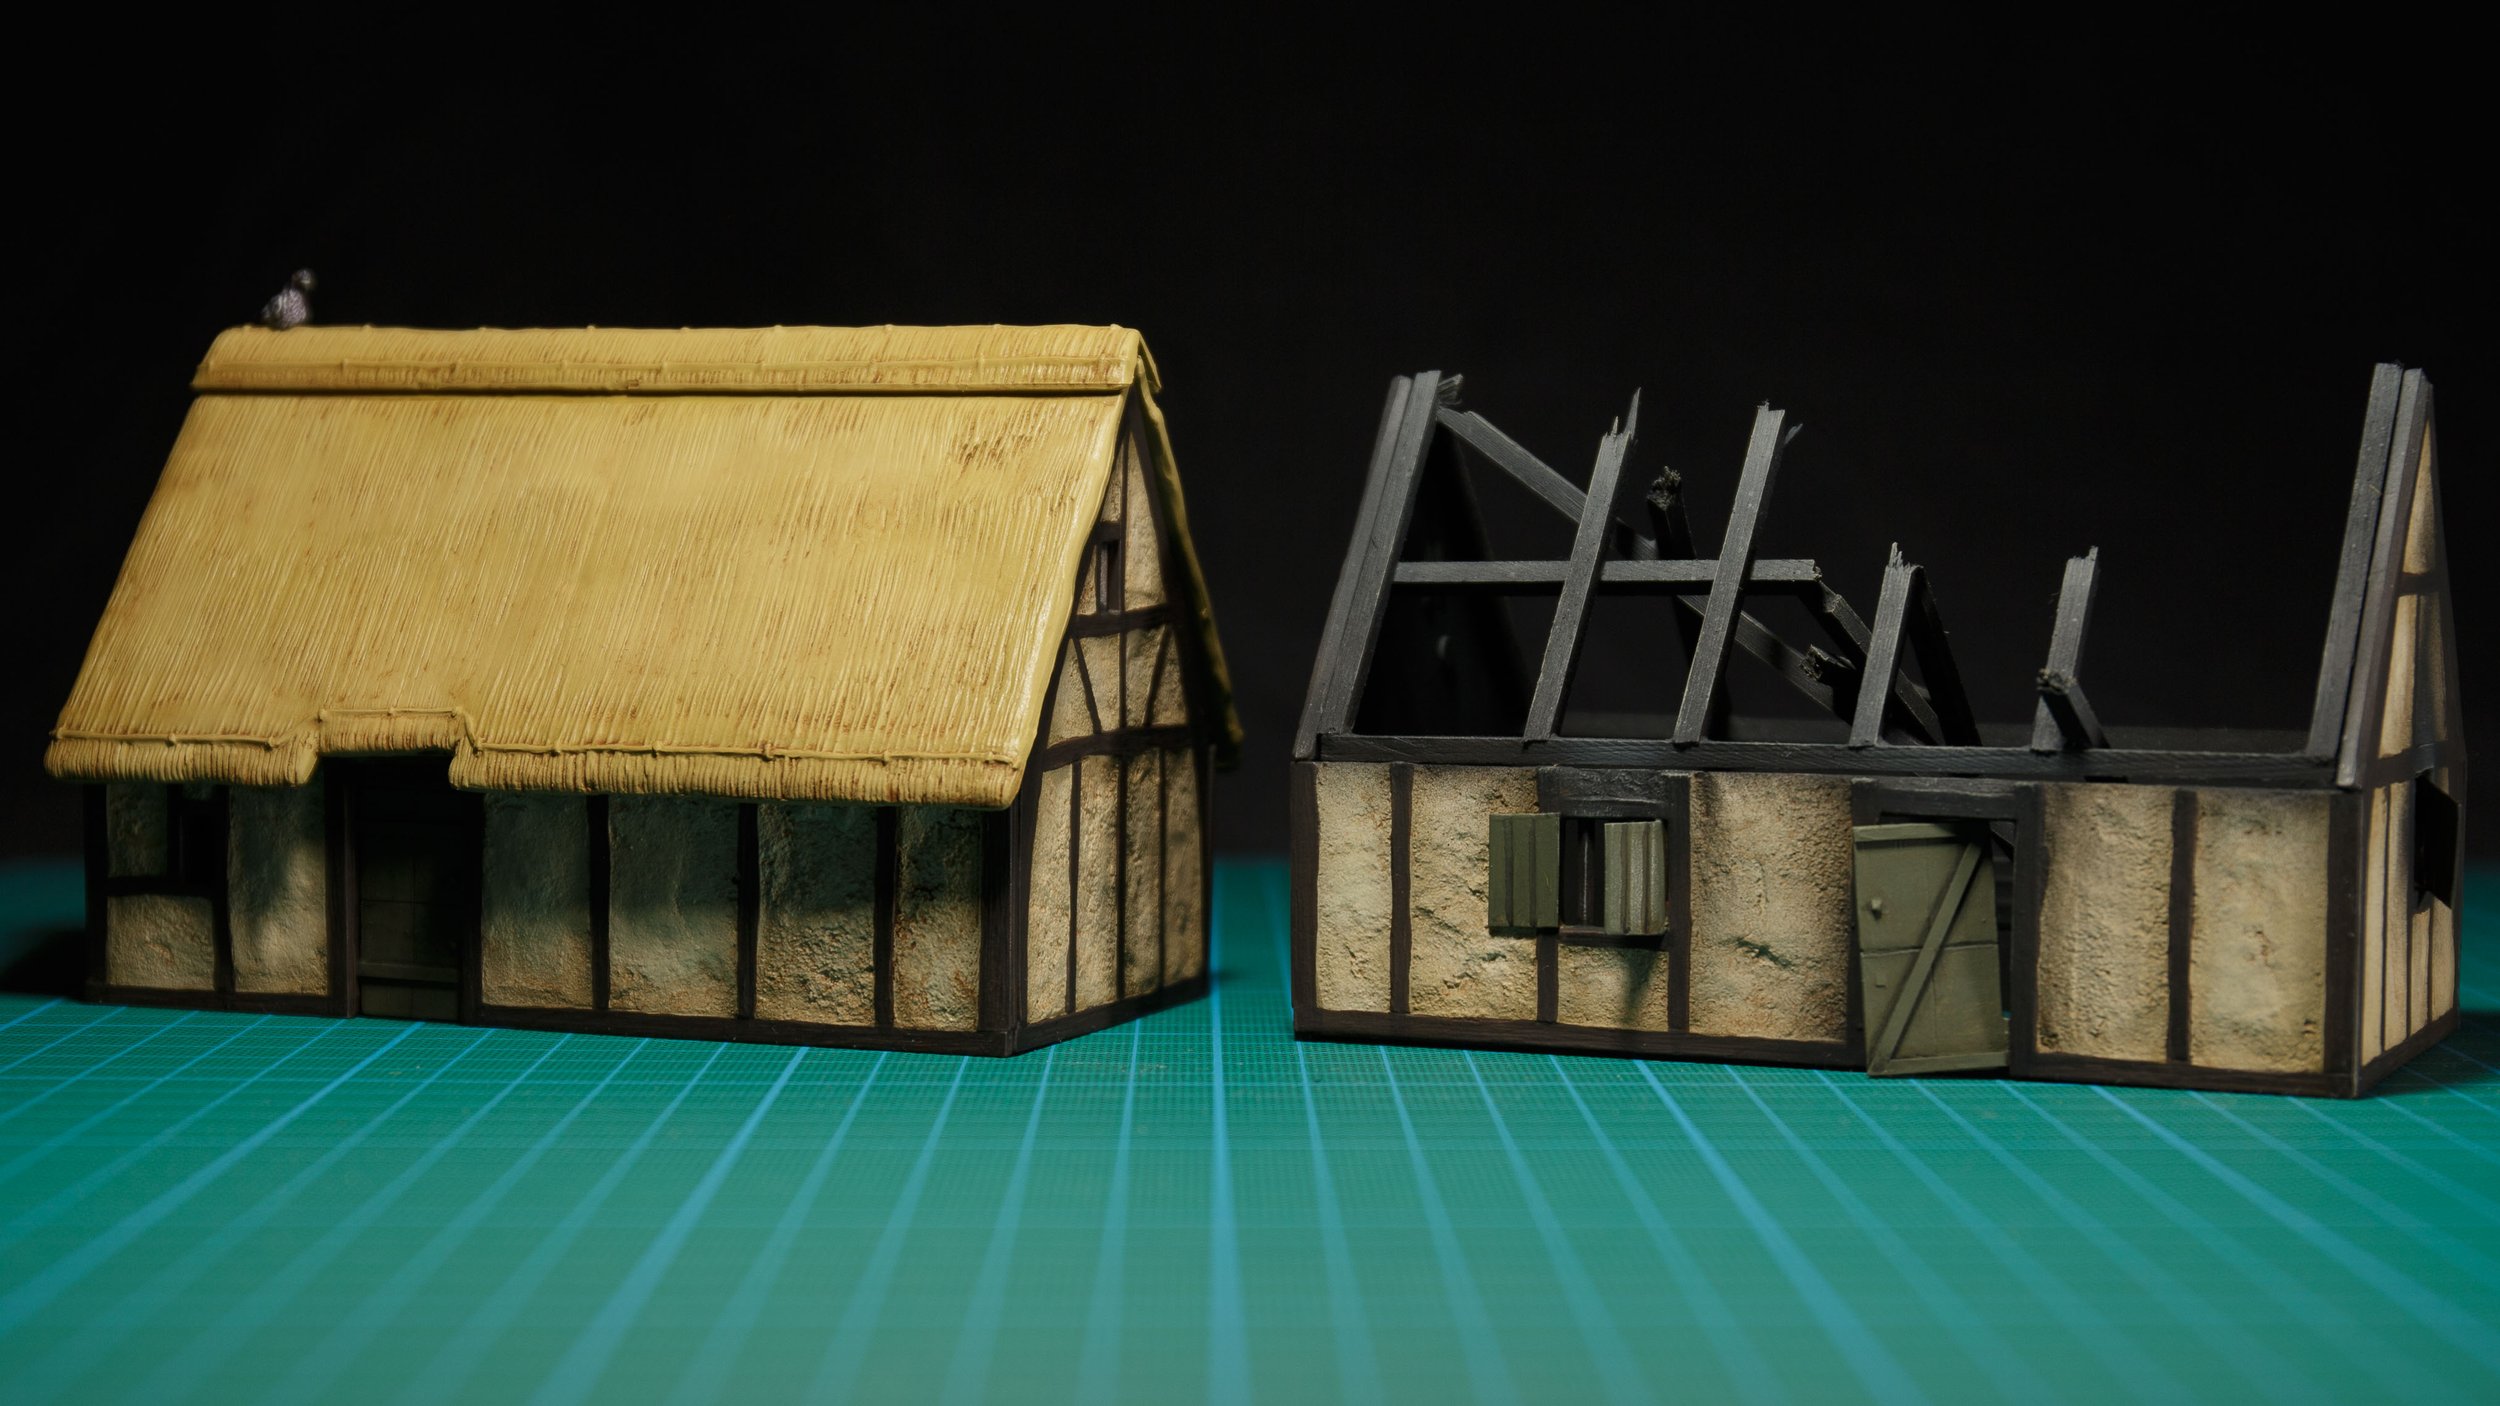
After some fairly easy conversion work I ended up with these:
A lot of the work would be done with fairly easy painting. All of the walls got a cream colourwd basecoat. The brickwork was done by simply holding the Sarissa Stencils on the wall and then dab with a brush on it. The wooden beams was picked out in a dark brown colour. To get some definition and weathering I used brown and black oil washes all over the houses. The burned parts were airbrushed black and then drybrushed with a lighter grey. Since these would be in the background of photos, and therefore a bit blurry, I wasn’t too worried about details on them.
I’m fairly happy with how these turned out. I didn’t spend too much time or money on these and I think I can get some usage out of them. Obviously they worked great for the ogres but I think I can use them for photos with my Dark Ages and WWII East Front collections. I also have a Hundred Years War-project planned and these would probably suit that too.
Anyway, here are two shots where the houses were used. There is obviously a lot of other stuff going on here to make these look different but I think the houses play a major part in giving them separate and distinctive looks.
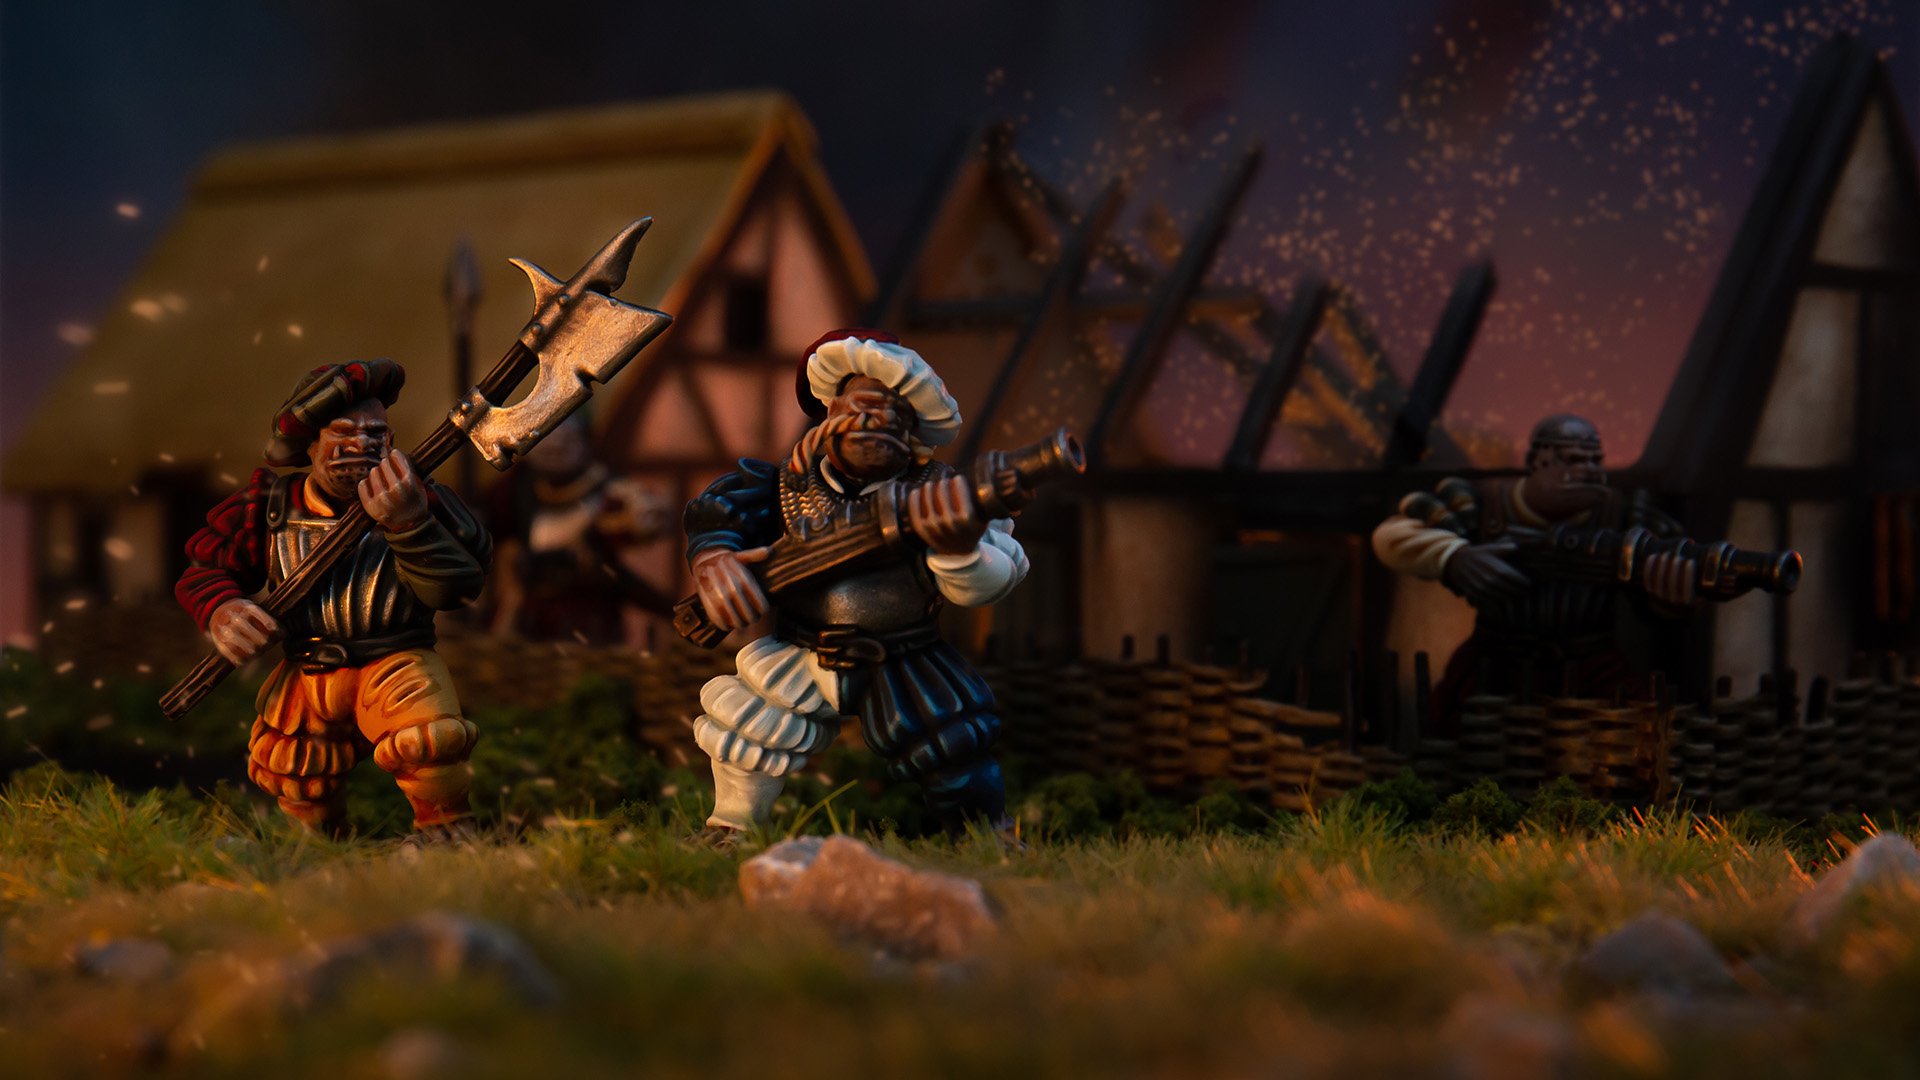
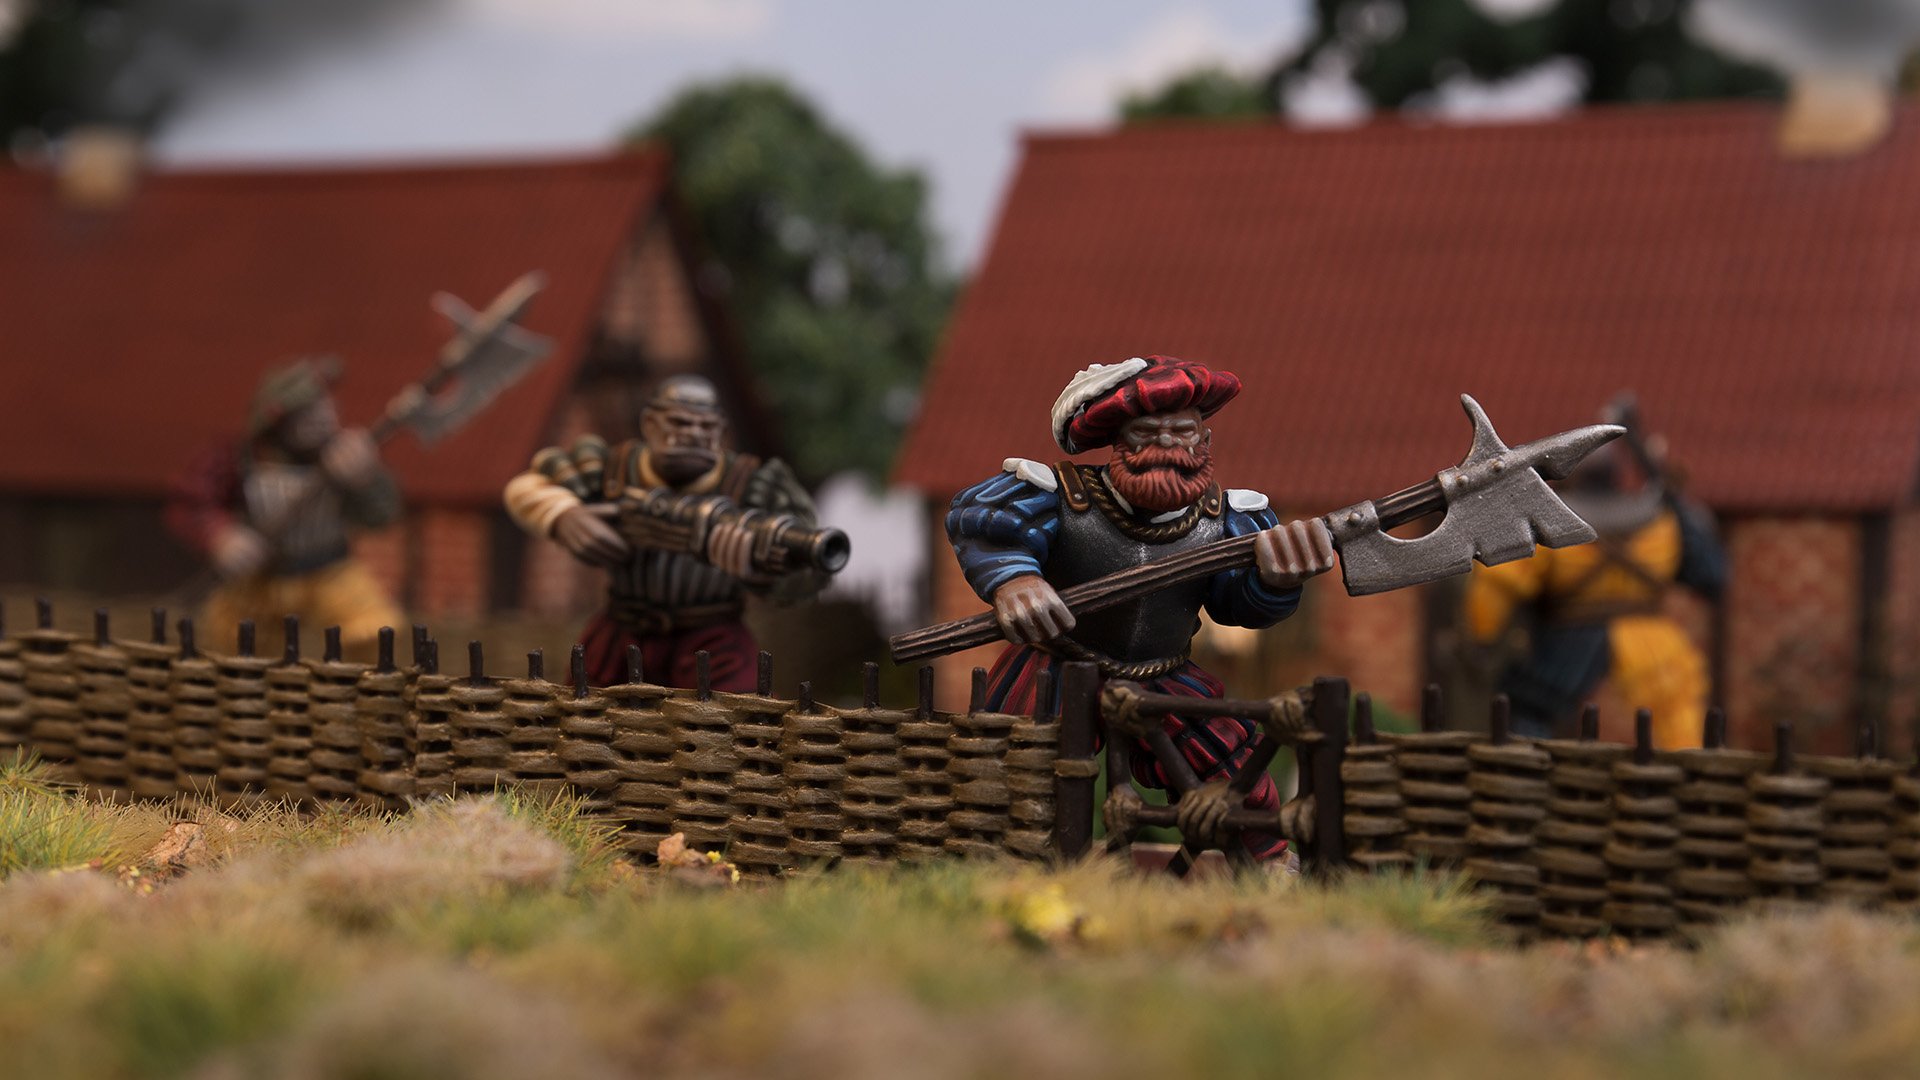
When Footsore Miniatures launched their Viking Kickstarter featuring Matthew Bickley's sculpts, I broke my self-imposed "No Kickstarters" rule - and I'm glad I did. But do they live up to Footsore's bold claim of being "probably the best ever made"?